The Adaptive Insights suite offers intuitive, self-serving reporting platforms that provide a live link to your data. They come in two forms:
- Web Reports – built and maintained in your Adaptive Insights model; commonly presented in HTML format.
- OfficeConnect Reports – created in Microsoft Excel via an add-on, allowing for more customised report formatting and excel-native formulas.
Read on to find out how you can get the most out of Web Reports in Adaptive Insights.
Navigating to Web Reports
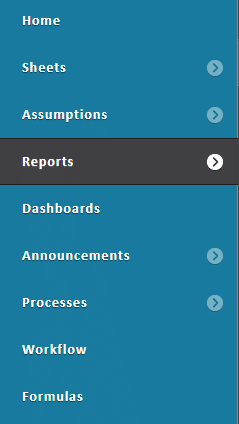
Web Reports can be accessed from the Navigation menu under Reports:
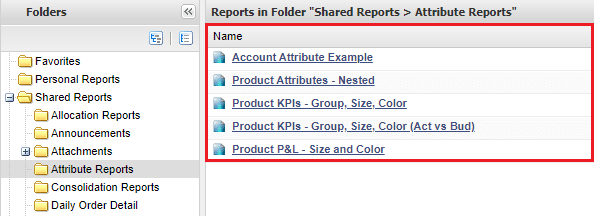
From the Reports portal, you will see the report folders on the left:

A web report is first saved in either:
- Personal Reports – which are available only to you, the author of the report, or
- Shared Reports – which are available to everybody, subject to the user’s level access. This implies that a shared report will filter its data to display only the levels that the user has access to.
A folder can have subfolders within, expand the folder to reveal them. See the Shared Reports folder for an example.
Select a folder to view all the reports within. For example, selecting Attribute Reports – a subfolder of Shared Reports – displays:
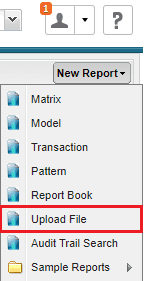
Folders can not only store web reports, they can also store OfficeConnect files or any other file type. For example, you may have an Adaptive training guide in PDF format that would like to share amongst your Adaptive users. Simply select New Report > Upload File from the Reports portal at the top right:
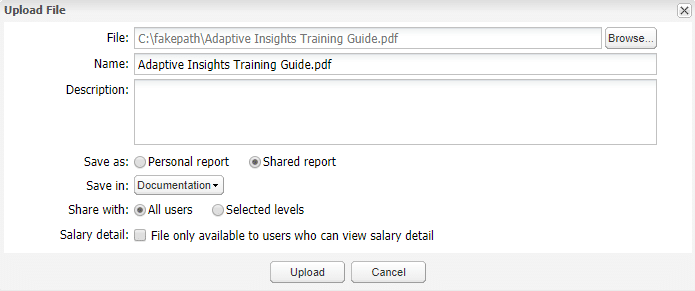
From here, you can select the file from your local or shared drive and choose the folder (or subfolder) in which you would like to save it.
Managing Reports
Organisation
Having a suite of reports that is clearly named and organised makes it easy for your end-users to navigate the portal and find their desired reports. Review your existing reports and complete the following actions if necessary:
- When naming reports, use syntax that is both clear and recognisable to your target audience. Simply right click and select Rename to edit its title.
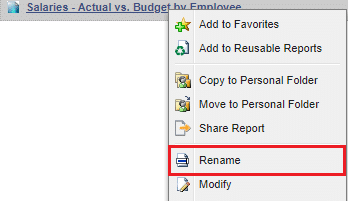
- Use subfolders to collate your reports into meaningful categories. Right click on an existing folder from the left pane and select Add New Folder.

Drag and drop reports into your new subfolder.
Accessibility
You can streamline the access to your most used reports in the following ways:
- Add to Favourites – right click on the report and select Add to Favourites:

Refresh your page and click the arrow next to Reports from the Navigation Menu. The report, and all your other favourites, will appear in a list to the right.
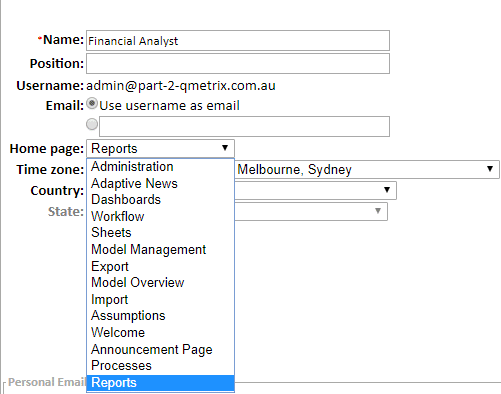
You can reorder your favourite reports by returning to Reports > Favourites and dragging more preferred reports to the top. - Set as Home Page – You can change your home page at any time by clicking on the user icon at the top right of your screen, then Settings:

Find the Home Page setting and select Reports. The Reports Portal will now display each time you log in.
Running a Report
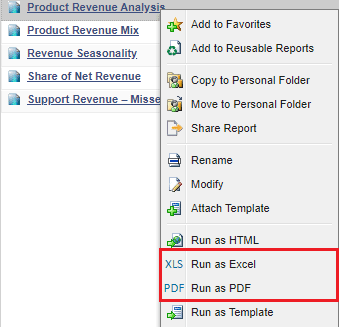
Left click on a report to run it in its default output. The default for most, if not all, reports will be HTML. For other output options, such as Excel or PDF, right click on the report and find the desired choice:
Running this report in HTML displays the following:
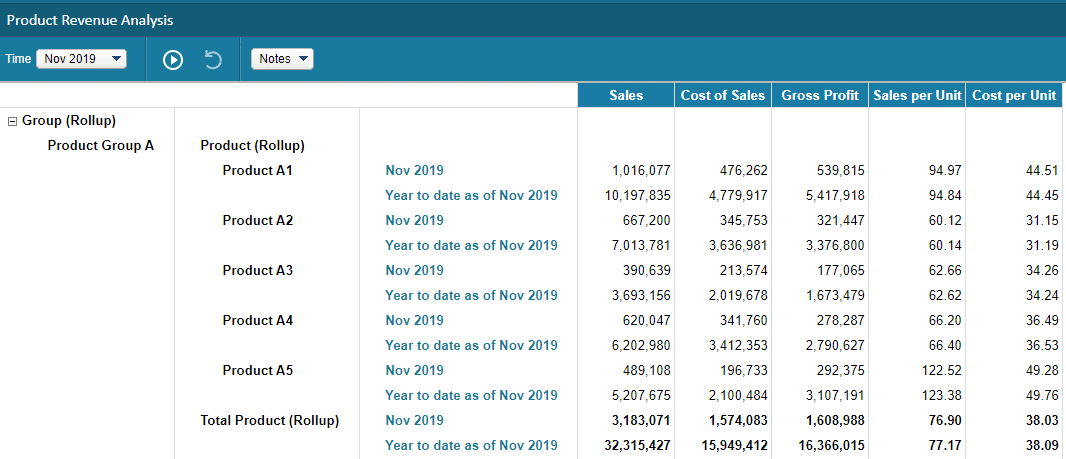
Within the HTML viewer, there are several tools available to enhance your analysis:
- Parameters – these are the drop-down boxes that sit at the top left of your report. They allow you to filter the entire report on a particular element value. For example, the time parameter allows you to filter the report on another time period:

Once a different element is selected, simply click Run

Only two parameters can display at any given time on a report. If there are more than two defined on a report, select Change Parameters

- Explore Cell: Left click on a value in the report to open the explore cell window. For example, the Sales value for Product A1:


From this window, you can:
- View the formula (if any) that is being evaluated.
- Toggle between different time periods or rollup time periods.
- View the breakdown by Level.
- Navigate back to its original sheet: Product Revenue.
- Export – The Export button displays at the top right of the report:

- Export to Excel for advanced analysis features such as sorting, conditional formatting and excel-native formulas.
- Export to PDF for a clean, compact view that you can save and distribute within your shared network.
Formatting a Report
Whilst building web reports in Adaptive Insights is a friendly and intuitive process, the initial output once you run it can often be messy and cluttered, particularly when a lot of information is being displayed:
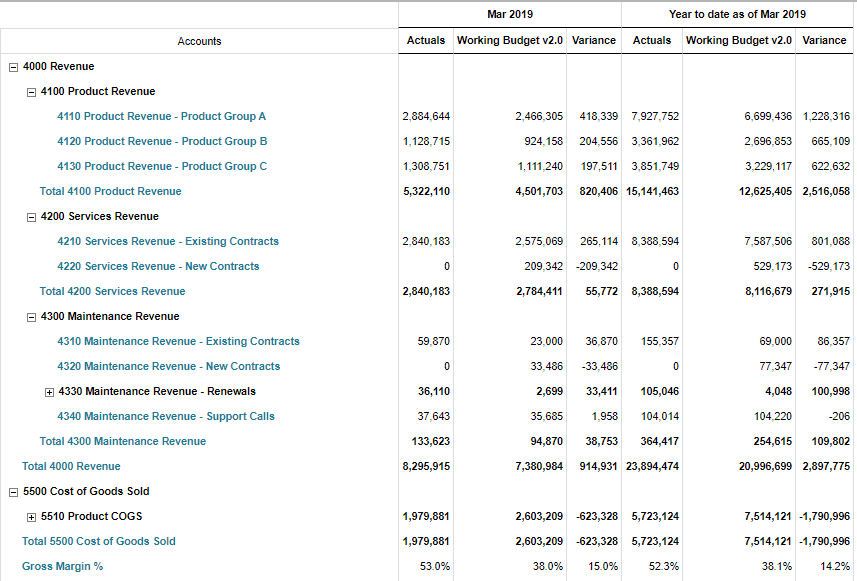
Consider using custom formatting to deliver clearer, more engaging reports for your users. First, right click on your report from the portal and click Modify.
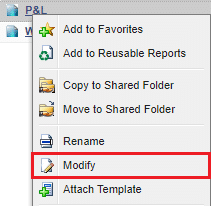
You will then be taken to the Report Builder.
Custom formatting can be applied to individual columns and rows or set globally for the entire report. In any case, it is managed in the corresponding Properties area. For example, to view the formatting settings for the entire report, navigate to Report Builder and then Properties from the toolbar:
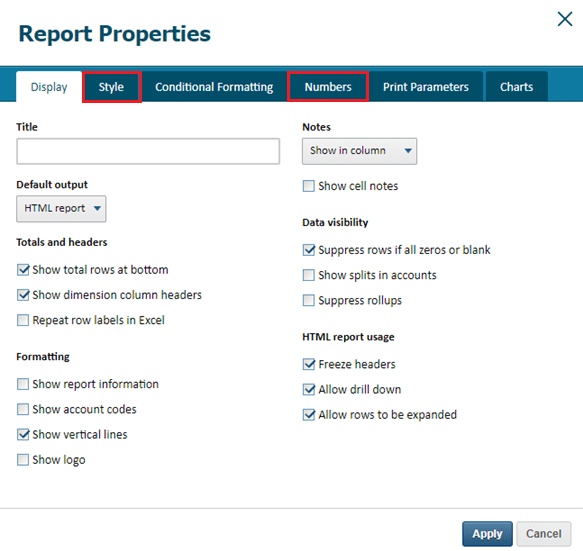
Consider the following formatting conventions that are applicable to the entire report:
- Font size – You may find Adaptive’s default font size, 8, too small to read when running the report. Think of your target audience as well, some of whom may have trouble with sight and would need the report to display larger, clearer values. From the Properties window, navigate to Style > Headers/Data > Font Size to increase to size 9 or more.
- Display of Zeros – By default, Adaptive insights will display zeros in number format, ie, 0. When scanning a report, these can be difficult to distinguish from non-zero numbers, and hence it is generally preferred to display them as a dash or as a blank space. From the Properties window, navigate to Numbers > Display Zeroes to change.
- Display of Negatives – By default, Adaptive Insights will display negative numbers with a negative sign at the front. Similar with zeros being displayed as 0, they are difficult to distinguish, and hence parentheses or red font is preferred. From the Properties window, navigate to Numbers > Negative number format to change.
Once you are satisfied with the formatting changes you have made, select Apply to save.
Similar formatting options are available for row and column elements. The most common settings that are applied to these elements are:
- Labels – Any element on your Report Canvas, excluding Filters, can be renamed by adding a Label. Simply right click on the element, select Properties and edit the Label setting. For example, to refine the name of our Working budget v2.0 element:


Click Apply.
Do the same with the other elements as desired.
- Column Widths – By default, Adaptive Insights will fit each column to be the exact length of its longest string, ie, it does not wrap text The result: messy and inconsistent columns widths. To rectify this, we define column widths to the elements in our column axis.
In our report, select all three column elements (Select the first, then use Shift+ Click to select the third), then right click and select Properties:


This allows you to set properties that are applicable to all column elements. In the Style tab, define column widths of 80 pixels; you can adjust this later as necessary.
Click Apply.
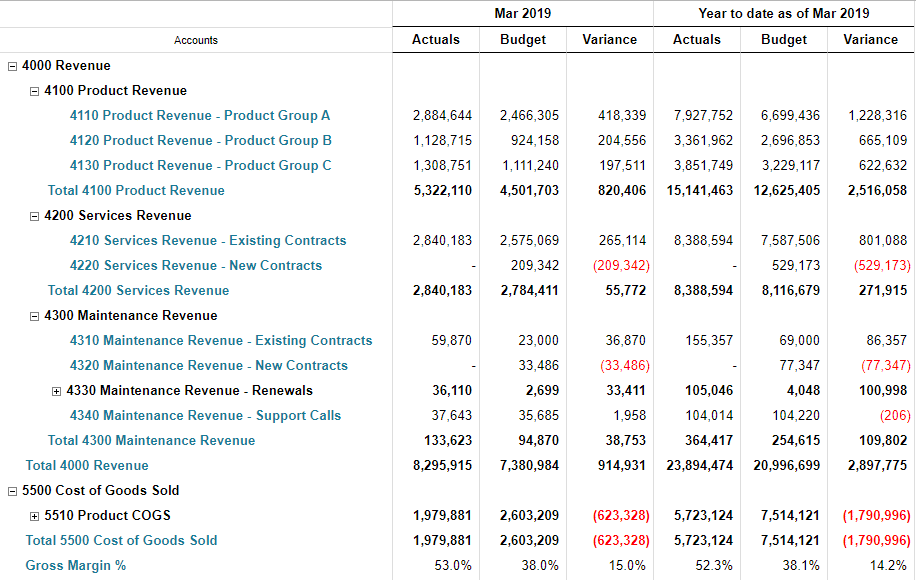
Once our formatting is complete, we can run the report and observe its impact:
Aside from Web Reports, the Adaptive Insight suite also offers OfficeConnect Reports – these are created in Microsoft Excel via an add-on, allowing for more customised report formatting and excel-native formulas. Discover how the South Australia Cricket Association used Adaptive Insights OfficeConnect to enrich board reports.
Looking for more Adaptive Insights best practice tips?


